
An organised visually strong whiteboard in only 3 steps
Nearly every day I run into them, standard whiteboards sharing information. Whether the board is deployed for internal communication or for communication towards customers, it would be handy if the boards were comprehensible and well-ordered.
In my experience, practice often shows the opposite. Documents that dangle over each other, un-organised information, old and new information hanging in clusters, and I notice many more visually weak points. Points that make the board rather scaring than inviting.
Look around for a moment, do you have a whiteboard at your organisation that isn't put to use optimally? Could your whiteboard also use a visual make-over?
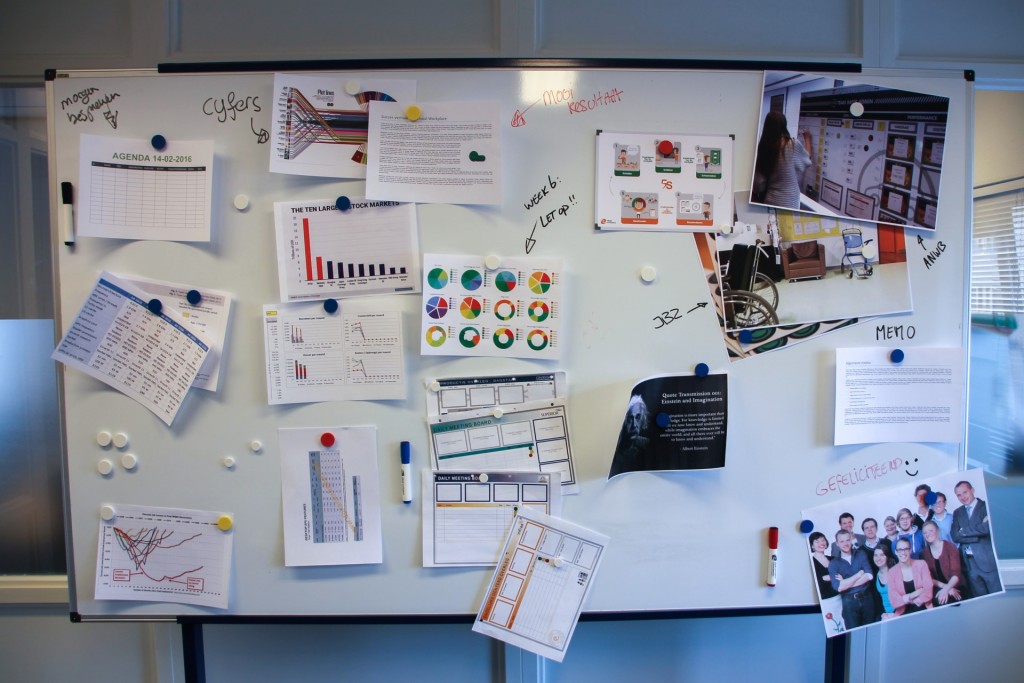
On the side you can see an example of what I often find. A whiteboard with loose documents, without any visual stimuli. I believe we could change this in three simple steps into a visual, well-organised whiteboard.
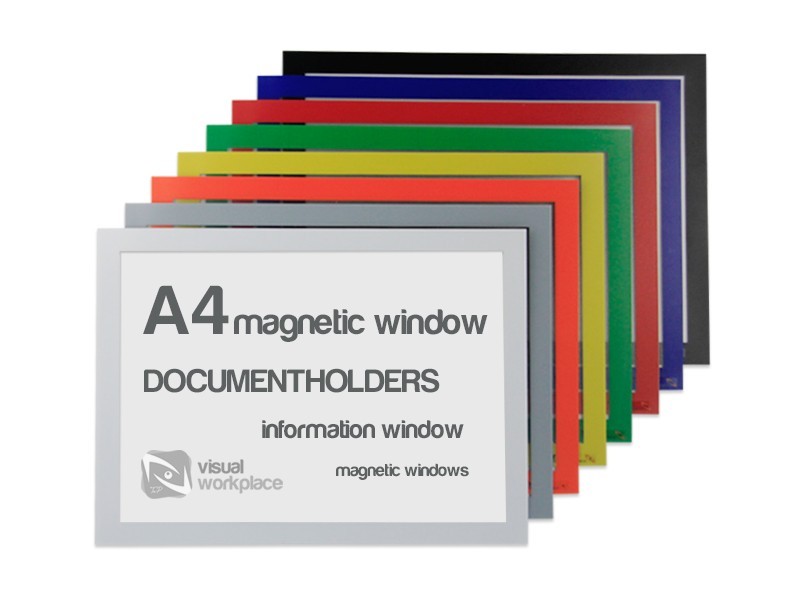
Step 1. Use magnetic windows
Magnetic windows are the perfect tool in the field of presentation & visual management. Magnetic windows make the board a lot more tranquil to the eye, because they can be placed snugly next to each other. Magnetic windows are available in A3, A4 & A5-format, and in 8 different colours, and three colour-combinations. The application of colour adds a visual status to the document that's placed behind it. You can, for example, provide a positive result with a green window.
Give each subject on the board a different colour, but limit them to 4 or 5 at most to retain a visual order. If you have a large whiteboard, and you'd like to make more subjects accessible, take a scrutinising look at the number of subjects and decide what is truly important to you. Pick a distinctive colour for these subjects and make sure that the rest gets a more general look. Do you want to describe the document on the board? Then make use of the magnet window, including cut out.
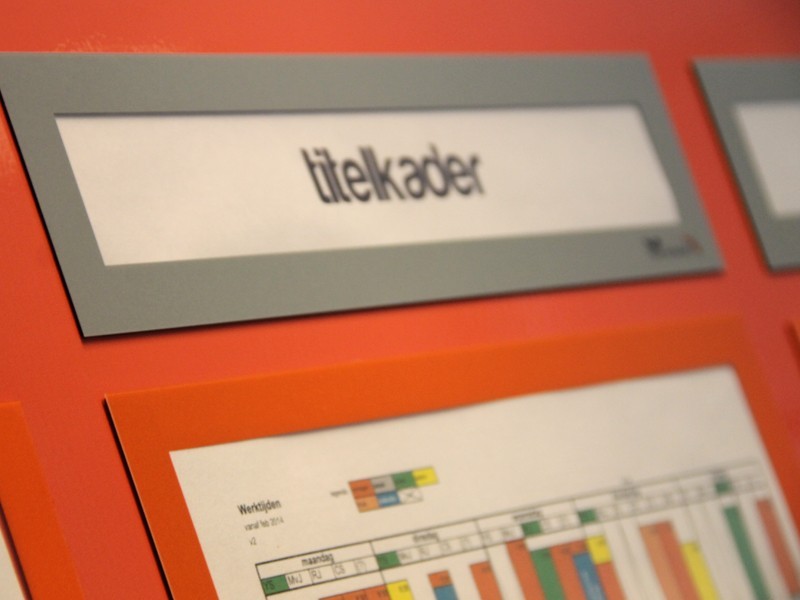
Stap 2. Use magnetic window headers
While magnetic windows already distinguish themselves by their colour, you can strengthen the various subjects visually even more by using caption frames. The frames fit on top of the magnetic windows, and are available in the exact same colours. With these caption frames you can give captions to the windows below in a professional manner. These caption frames are available in A3, A4 & A5, and can be used both in portrait and in landscape orientation.
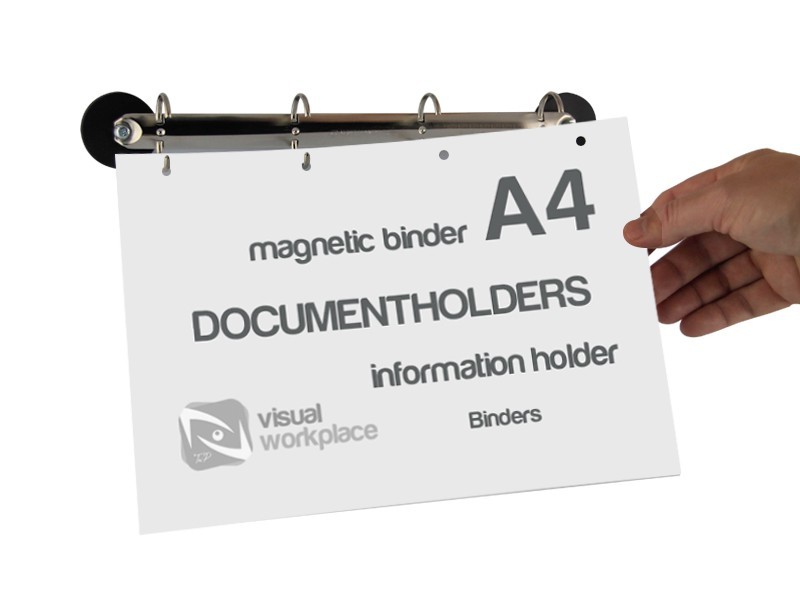
Step 3. Use ring binders
A magnetic ring binder is ideal for visualising bigger quantities of information on both A4 and A5 format. By using a ring binder, you don't need an enormous amount of space, while remaining manageable for 'users' of the board as they can browse.
The magnetic ring binder is ideal for archiving documents. Sometimes, information isn't really important enough at a certain moment to visualise behind a magnetic window, while it does need to remain accessible on the board (you must be quite selective here, in deciding whether information on a document really is important enough to be archived on the whiteboard). By archiving it using a ring binder, you make sure that only the information that is most important at the moment, is directly accessible in the magnetic windows, while the other information can still be recovered on the whiteboard.
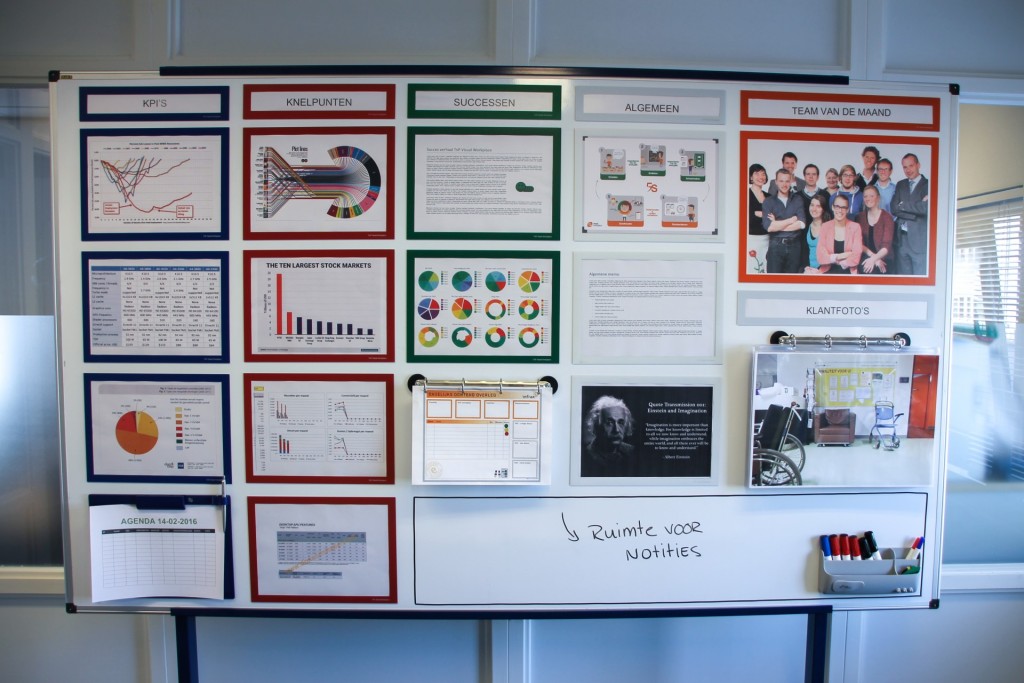
The result
By applying the above steps to our trial board, we get the following result; a visually strong board that, through colours and frames, distinguishes between important and less important information. You create calm and order, and make the information board accessible again for your employees/colleagues.
Of course TnP Visual Workplace has more products in its range to make your whiteboard visually stronger. Would you like to see how this would work out for one of your whiteboards? Respond below, or contact us. We'd be happy to help you with a visual elaboration like the one in this blog.
Good luck!